Making Folios (No, Not the Art Kind)
- Feb 5, 2016
- 2 min read
When life gives you lemons, make lemonade. But when life gives you watermelons, pineapples (which in no way resembles apples) and other dangerous fruits, it's time to invest in a maximum-strength blender and chop that shit up. The moral of the story here is that life is unpredictable and thus, we must make the most out of every single day. Feed the poor, feed the rich, don't let your dogs loose on the neighbour's lawn and generally be a good person.
But first, we must learn how to make folios.

The Master page will be your best friend for the rest of your graphic design career. Feed and befriend it, and don't forget to burp it to prevent intestinal gasses.
For this folio-making tutorial, we will be using grids. They can be activated by going to View > Grids & Guides > Show Document Grid.

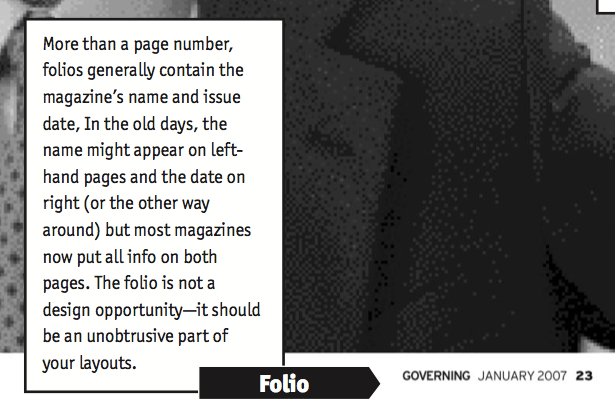
Create a text box in the bottom corner and type in the company name/magazine title/article category/whatever. Just type, man. We've got bananas to eat.
Don't forget to go activate Type > Show Hidden Characters.

What sets graphic designers apart from normal people is how we insist on using hidden characters instead of just pressing Space. Go to Type > Insert White Space (which is like a blank space except it's not blank, go figure) > En Space.

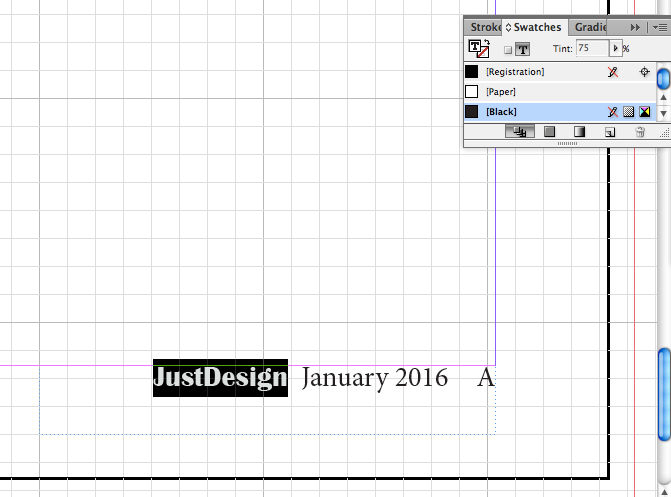
This will insert a widdle thing that looks like a lightbulb trying to screw itself to the ceiling. Type in the month and year. You are allowed to use the regular Space bar for this.
As you can see, the En Space creates a larger, more aesthetically pleasing space between "justdesign" and "january". Compare this to the space between "january" and "2016".

The Em Space is about three times longer than the En Space. They can be accessed in the same way.


The Page Number is probably the reason why you're creating folios in the first place. Use that shit and put it in.

This is what your folio will look like:

Another thing that sets graphic designers apart from normal people is the fact that we're geniuses and make this option available:

Creating a folio for the opposite page:


This is also where we learnt about Character and Paragraph styles. Those things are f*cking amazing, they turn your half-an-hour-work into a twenty-nine-and-a-half minutes work.
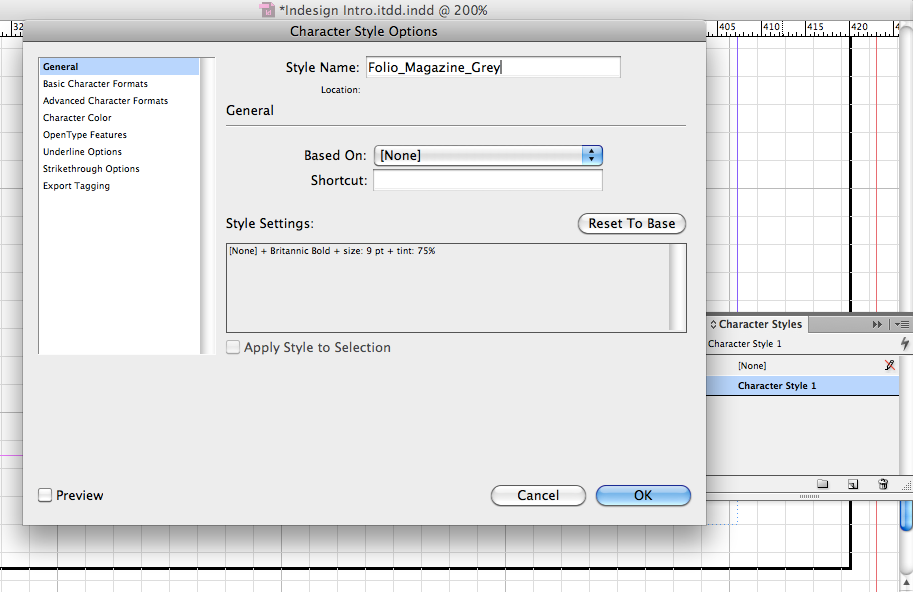
Basically what they do is save any effects (such as Bold, italics, colours, fonts) you have done to the word/paragraph. So when you want to apply the same effect to another section of the text, you can just highlight (Character Styles) or click (Paragraph Styles) to do so.

This is what the final folio looks like. The "A" will be replaced by the according page number once you get out of the Master Page (which exists in a different dimension from all the other pages).
A handy exercise, if only to learn how to insert five Space bars worth of blankness without murdering your keyboard.
Comments